These days, when you go to a website, the website might change depending on your profile, or a cookie that informs that they should change images on the landing page. But wouldn’t it be cool if you could easily do that with your documents?
Most of the time we expect personalization online, but when it comes to documents, we are relegated to typing things manually into a Word document or other formats. No automation, just all manual.
Let’s say you are writing a proposal. The proposal is for a client in the healthcare industry, so you want to make the best impression so you change all your images to look more healthcare like. Maybe you use Adobe Stock to add stock images and have pretty pictures of doctors and patient care. To do that, you might end up for hours tweaking and adjusting your document, replacing images, etc.
That’s kind of a drag, isn’t it? It can take a whole lot of effort just to write a proposal, let alone then having to choose all those different images to make things feel more personalized. There has got to be an easier way!
Fortunately, there is. This past month, we announced the launch of Adobe Document Generation API, which allows you to dynamically generate documents based on data. My colleague, Ray, created a walk-through Hello World tutorial to help you get started using Document Generation API, and also a great tutorial on how to use conditional content in your documents. I encourage you to check that out as well our documentation before jumping into this tutorial.
One of the primary benefits of Adobe Document Generation API is not only does it allow you to merge your text data into a document, but it also allows you to merge image data as well. In this article, we are going to deep dive into some of the tips for using images with Adobe Document Generation API.
Tip #1: Make sure your images are encoded correctly in your JSON data
You can pass images into your template from inside your JSON data by converting your image data into Base64. When you do include your image as Base64, it is also helpful to include your mime-type like below. While technically you can pass the Base64 without the MIME type, this does help ensure that you don’t run into any errors while processing.
If you are writing your code in NodeJS, here is some sample code on how to encode your image file as Base64 in your JSON data:
Tip #2: Image file types that are supported
When merging images into your document, you can use the following image formats:
- image/png
- image/jpeg
- image/gif
- image/tiff
Tip #3: Tag your documents using Adobe Document Cloud Tagger
Adobe Document Generation Tagger allows you to easily place placeholder images into your document. When you add your sample data set, make sure you have a record that includes a sample like suggested in Tip #1 which includes the “data:image/png;base64,” at the beginning. Otherwise, Adobe Document Generation Tagger may not recognize the field as an image.
You can then place the field by doing the following:
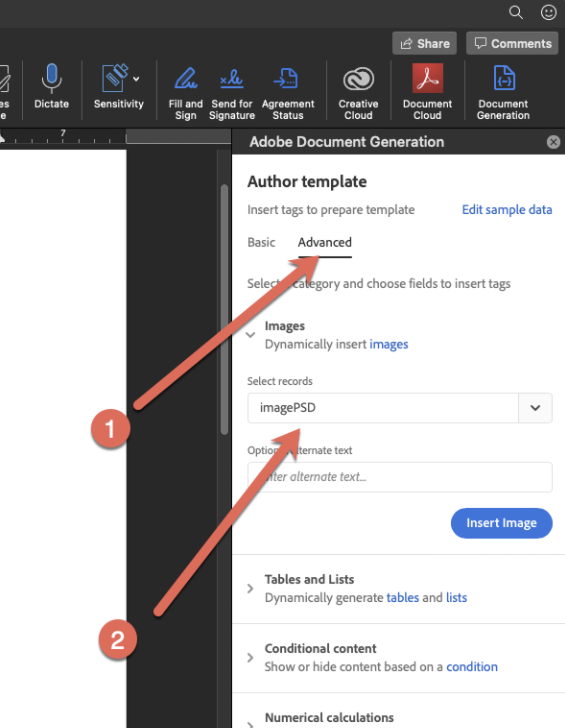
- When you have Adobe Document Generation Tagger, click on Advanced and expand Images.
-
Under Select records, choose which field you want to place image data from.
-
Click Insert Image.
-
You can then resize the image to your needs.
Tip #4: Be aware of your file sizes
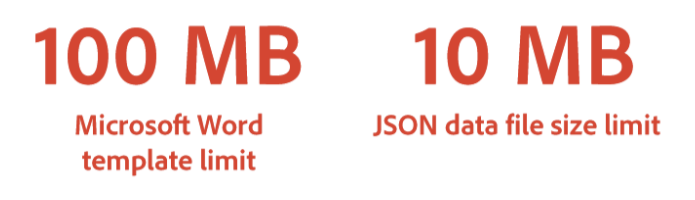
Limitations for your Microsoft Word template are based on file size and not on page quantity. Your Microsoft Word template can be a maximum size of 100MB.
Join Medium for free to get updates from this writer.
Remember me for faster sign in
For your JSON data (including the images that are passed as Base64), your limit is 10MB. For that reason, you might want to:
- Make sure you crop your images to as small of a size as possible before passing into the document so that there is no unnecessary data.
- Try to avoid uncompressed file formats like TIFF.
- If have an image you want to place in multiple locations, like a logo, you absolutely can. In this case, pass the image information once, and then reference it.
Tip #5: Map your images to existing images in your Word document
What would be really nice is if I already have a designed document in Word with images, I’d love to just tag the images I already have placed so I can replace images from data. You do not actually have to use Adobe Document Generation Tagger to place a placeholder image. If you have a Microsoft Word document with images already placed in the document, you can tag that image to replace that image:
- In Microsoft Word, click on an image you have placed in Microsoft Word.
- Right-click on the image and select Edit Alt Text… (this is the same for both Mac and Windows).
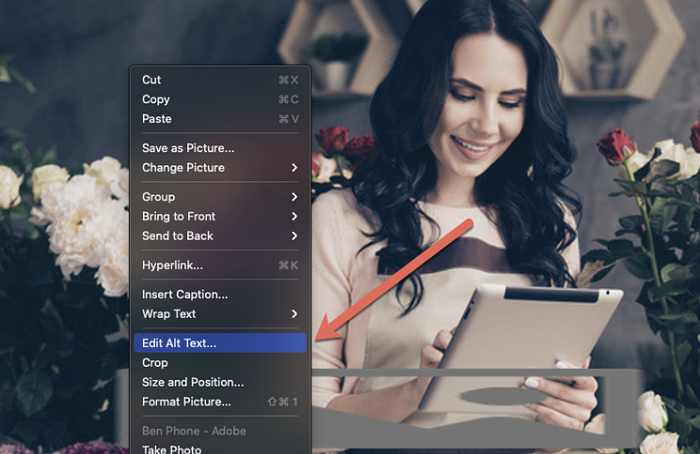
- Insert the following text, replacing
with the path to the image in the data (ex. Images.logo) and replace the with the alternate text of the image (for accessibility).
From there, you will then be able to have images replaced from data. Some great examples where this is helpful:
- Replacing images in a document.
- Changing cover pages based on different themes.
- Changing a portrait image in a letter.
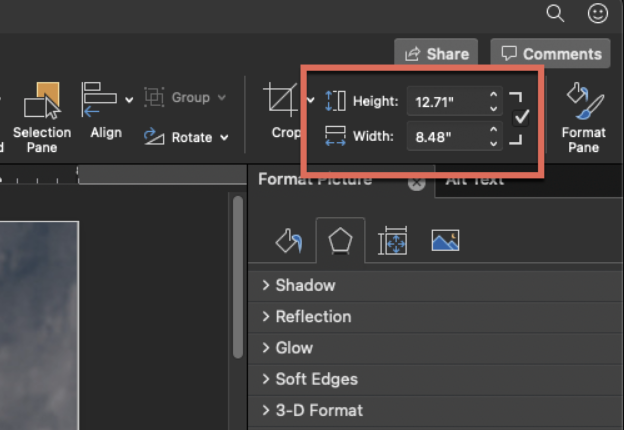
Tip #6: Save your image dimensions so they map correctly
When an image is merged into a template, it is simply replacing the image in the image frame. If the image coming from the data is not the same dimensions of the document it could come in skewed.
The best way to fix this is to make sure that your image ratio of the data is the same as the one in the document.
To get these dimensions in the template:
- Select an image in your Microsoft Word template.
- In the Ribbon, click on Picture Format.
- You will then see the Height and Width parameters. You can use these to calculate your dimensions.
Another way to make sure things match is if you already have a copy of an image you would want to place in the template, you can place it into the Word template and then make different versions based on those dimensions.
Tip #7: You can insert many images in a document
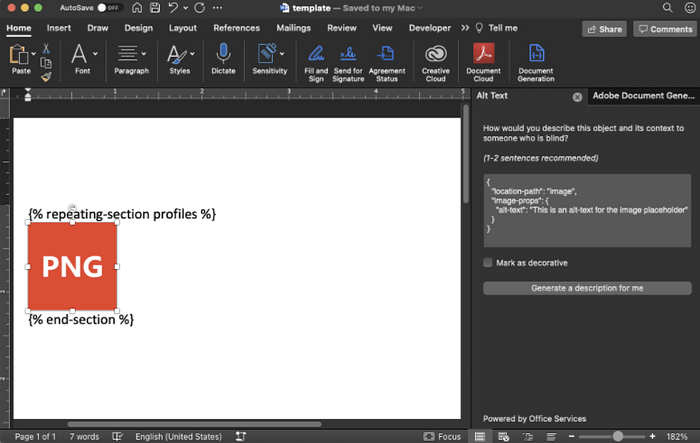
Let’s say I am writing a proposal and I want to include a list of all the team members and their profile images in the document. You can do that from an array and using the {% repeating-sections %} tag.
For your template, it would need to look something like this:

An image is in between the starting and closing repeating-section tag. For the image, based on Tip #5, you can set the tag name relative to the array in the data. In this example it is” image”.
This is what the source data looks like:
Tip #8: Combine with image libraries
To add onto Tip #5, to optimize your photos before they go into Adobe Document Generation API, you can use image libraries to help reduce the size of images, crop them, etc. There are many of them out there. You can consider looking at the Photoshop API. For basic cropping and resizing, ImageMagick is also often a common library.
Tip #9: Use a URL for a source of a document
When we first launched Adobe Document Generation API, we initially only supported base64 passed in JSON. In 2022, we launched now the ability to pass a URL of an image.
This way, you do not need to convert your images to Base64, you can just refer to their URL.
Final thoughts
Being able to add or change images when generating a document really lets you personalize a document and make it look fantastic. Personally, one of the things I am most excited about is it starts to bring some of the flexibility that we are used to in websites dynamically changing websites and bringing that intelligence easily to documents you create. From there, the possibilities and use-cases are limited only by your creativity.
If you want to give it a try, you can try for free. You can also check out many of the other services, such as Combine, Extract, and other features.
UPDATE (3/30/2022): Updated to include Tip #9.