A few weeks ago, I worked with a customer who was sending their offer letters out to candidates using Adobe Acrobat Sign. Once signed documents came back, they would download their signed copies and import them manually into the employee’s folder in SharePoint. This might seem simple at first, but multiply the time this takes when you have 400 new employees during the holiday shopping season; this time adds up quickly!
If you are sending documents directly from SharePoint, Adobe Acrobat Sign for SharePoint provides a way to store signed agreements automatically. This, however, requires you to have sent the agreement to Adobe Sign from within SharePoint.
What if you sent it from Adobe Acrobat Sign dashboard or elsewhere? This guide will show you how to push signed agreements into SharePoint automatically no matter where you initiate the send with Adobe Acrobat Sign.
Prerequisites
- Adobe Acrobat Sign for enterprise subscription
- Microsoft Power Automate
- Microsoft SharePoint Online*
*It is possible to have signed documents automatically route into on-premise versions of SharePoint, but it does require a little different effort and is not in the scope of this article.
What is Microsoft Power Automate?
Microsoft Power Automate is a service as part of Microsoft 365 and the Power platform that enables you to create automated workflows between your cloud and on-premise applications without writing code. It integrates with Adobe Acrobat Sign and Adobe Creative Cloud in addition to over 250+ connectors. This allows you to easily connect Adobe Acrobat Sign in to any of your enterprise and cloud applications.
Setting up Microsoft Power Automate with Adobe Acrobat Sign
Let’s walk through the simple steps to configure Microsoft Automate to import signed documents from Adobe Acrobat Sign automatically into Microsoft SharePoint:
Start with Microsoft Automate template
- Log in to Microsoft Power Automate using your Microsoft Office 365 credentials.
- On the sidebar, select Templates.
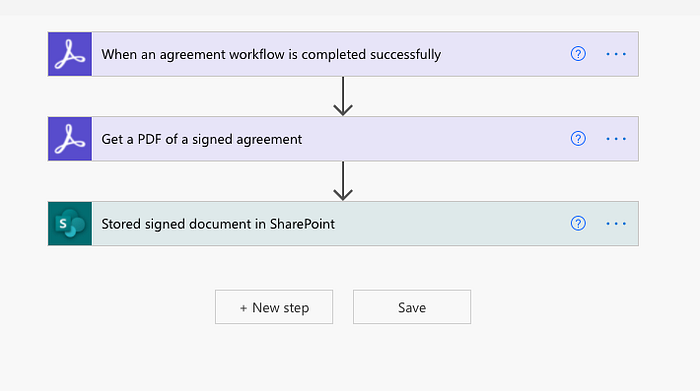
- Search for Adobe Acrobat Sign and SharePoint. Select the template called “Save an Adobe Sign completed an agreement to SharePoint library.”
Authenticating Adobe Acrobat Sign
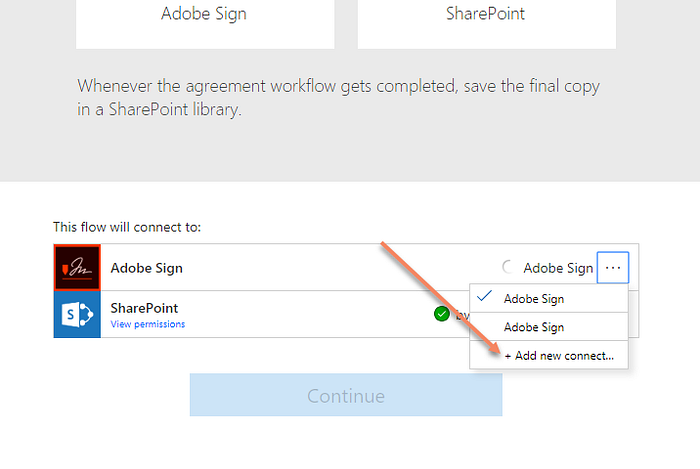
If you do not have a connector already setup:
Click the Ellipse menu … to the right of Adobe Acrobat Sign and select + Add new connect…
If you are not already logged in, you will be prompted to log in to Adobe Acrobat Sign.
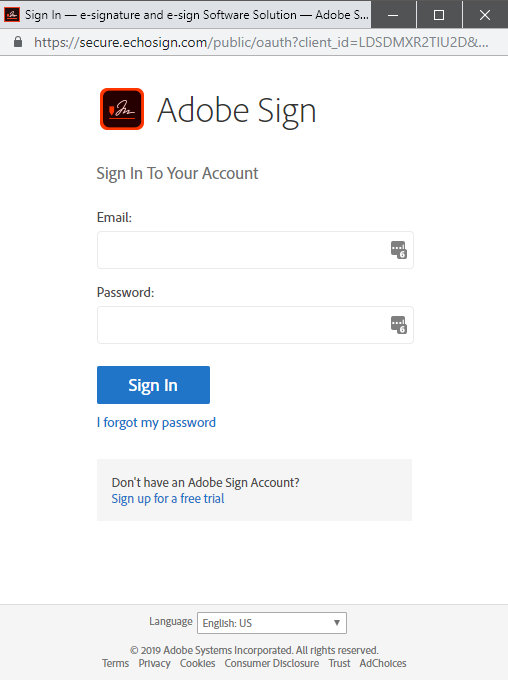
When it prompts you to give permission for Microsoft Power Automate to connect to Adobe Acrobat Sign, click Allow.
Authenticating SharePoint
You will need to authenticate to SharePoint if you haven’t already.
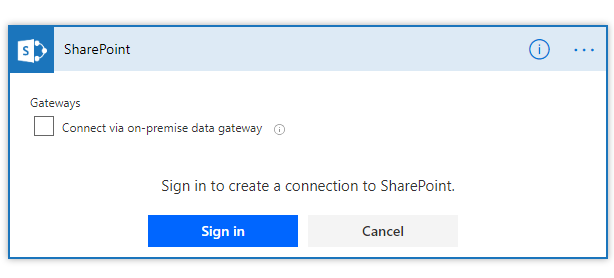
Click on the Ellipse menu … next to SharePoint and select + Add new connect…
When prompted, click on Sign in to connect to your SharePoint account using your Microsoft credentials. Note: If you need to connect to an on-premise data gateway for on-premise SharePoint, you can do so by clicking the “Connect via on-premise data gateway” checkbox.

Once you have authenticated both, which is indicated by the green checkboxes for each connector, you can click Continue.
Configuring Adobe Acrobat Sign trigger
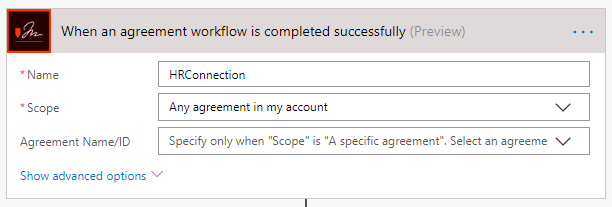
Adobe Acrobat Sign triggers allow you to trigger a flow in Microsoft when agreements are signed.
Under the Adobe Acrobat Sign trigger named When an agreement workflow is completed successfully, set the Name field to something you would like to use to reference this connection. Ex. HR Connection.
Under the scope, choose whether you want only agreements you send to trigger this flow, anyone within your group, or anyone within your account.
Note: This scope is dependent on whether you have the appropriate permission (Account Admin, Group Admin, etc.).
Configuring SharePoint step
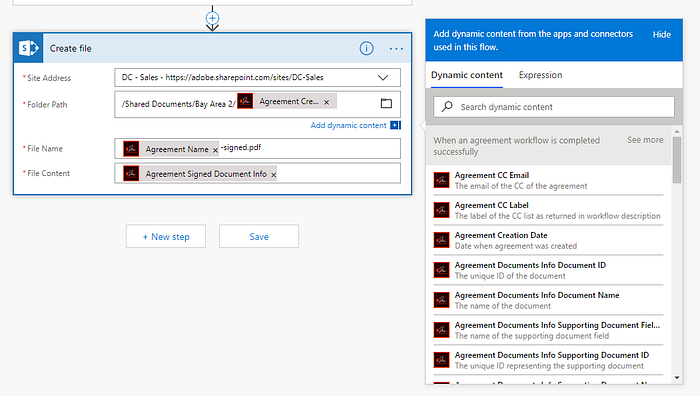
- Under the SharePoint step named Create file, click the arrow drop-down in the Site Address field to select the SharePoint site. With Microsoft 365, it should populate with the ones you have permission. If not, you can type the URL to your SharePoint site manually.
- Under the Folder Path field, click the Folder button to navigate the path you want signed documents to reside.
You can also have a dynamic path where signed documents will end up. For example, maybe you want to store it in folders based on the date or signer.
- In the Folder Path field, type the overall path of where in SharePoint you want signed documents to be stored.
- ex. /Shared Documents/Bay Area 2/
- When you click in the Folder Path field, the Dynamic Content pop-up will appear, allowing you to add fields into the folder path.
- Select Agreement Creation Date in the Dynamic Content panel.
If a folder does not exist in the path you write, SharePoint will create the folder to place your document in.
Get Ben Vanderberg’s stories in your inbox
Join Medium for free to get updates from this writer.
Remember me for faster sign in
You are now ready to test your workflow.
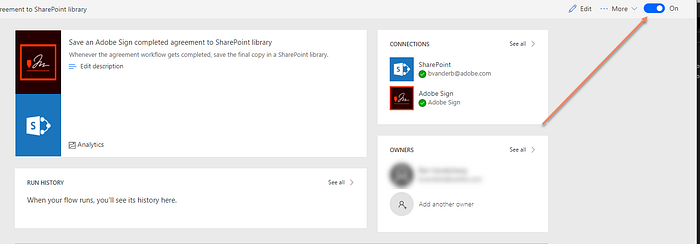
- Click on Save to save your workflow.
- Click on the Back button.
- Ensure that the Flow is activated.
Testing your flow
Log in to Adobe Acrobat Sign and send a document to an email address (not the same email address as your Adobe Acrobat Sign login). After you have signed the document, check to see if your signed document is stored in SharePoint. If not, then you will need to check your flow.
How to troubleshoot

- Login to Microsoft Power Automate.
- Under My flows, select the flow you just created.
- You will see under Run History whether the flow was triggered. If there is an error, you can click on the item in Run History to see where in the workflow the error occurred.
BONUS: Adding agreement information as metadata
Do you also want to add Adobe Acrobat Sign-related metadata into your columns when you import them? No problem! For this, let’s assume you already have columns for Signing Status, Signer, and Signer Email. If not, you can walk through doing so here.
- Open the flow we created in the previous steps into Edit mode.
- Click on New step…
- In the Search connectors, search for Update file properties. The search will return a SharePoint step. Select it.
- Set your Site address to the same settings as the previous Create file SharePoint step.
- In the drop-down for Library Name, select the library you are storing your documents in.
- Ex. Documents
- Under ID, use the Dynamic Content panel to select the ItemId from the Create file step.
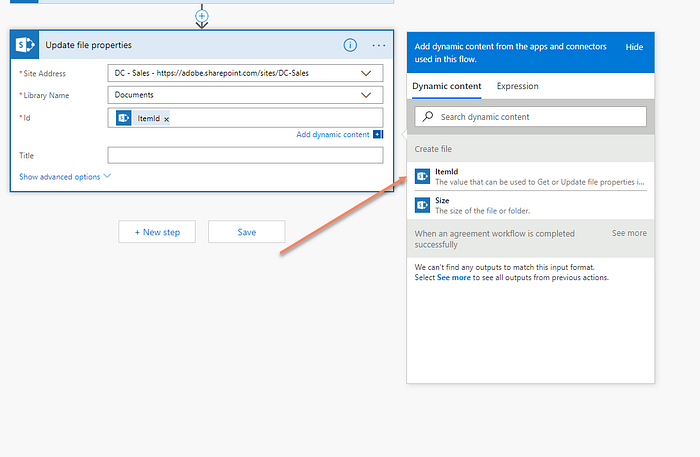
You will see your columns listed below. Using the Dynamic Content panel, you can select what information from Adobe Acrobat Sign you want to be placed into the appropriate SharePoint fields. Here are a few that are commonly helpful:
- Agreement Name
- Event Participant Email
- Agreement Status
Final words
Microsoft Power Automate is a powerful companion to Adobe Acrobat Sign, allowing you to easily take your documents and forms that are signed with Adobe Acrobat Sign then update and store them directly into your Microsoft environments, as well as other applications. Have a look at all the templates to inspire how you can automate everyday tasks quickly.
Resources
Adobe Sign for Microsoft PowerApps and Power Automate
The signature requested event gets broadcasted for both when you are thesender, and when your signature is requested…
helpx.adobe.com
Adobe Sign | Microsoft Power Automate
Adobe is the most trusted digital document sign service in the world. With Adobe Sign, you can transform manual…
us.flow.microsoft.com
Adobe Creative Cloud | Microsoft Power Automate
Connect to Adobe Creative Cloud to manage your assets. You can perform various actions such as create, get, and delete…
us.flow.microsoft.com
Related Articles
No Code Integration: Send Adobe Sign Agreements Using Logic Apps in Microsoft Azure
Logic Apps are an extremely powerful, easy way to connect your cloud apps (including Adobe Sign) and your apps in…
medium.com
Creating Microsoft PowerApps with Adobe Sign
How to integrate Adobe Sign into your Microsoft PowerApp.
medium.com
Create a QR Code for Paperless Web Forms with Adobe Sign Web Forms
Learn how you can quickly create a web form with a QR code with Adobe Sign.
medium.com
Variable Number of Recipients for Adobe Sign for Microsoft Power Automate
Need to add a variable number of recipients based on a workflow? Here’s how.
medium.com
Merging Data with Documents Using Adobe Document Generation API
Merge data into your PDF and Word documents dynamically to generate PDF or Word documents in your app.
medium.com
UPDATE (6/15/2021): Changed brand names based on updates to Adobe and Microsoft brand changes.