Whether it is release forms, student forms, or HR forms, many people use Adobe Acrobat Sign to capture form information on PDF forms and capture signatures. Adobe Acrobat Sign Web Forms provides a great way to convert your paper or PDF forms into online web forms that you can embed on your website or share as a link.
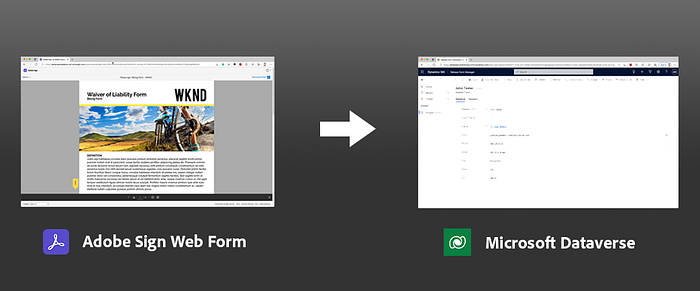
By default, when you fill and sign a web form, the PDF copy and the form data will get stored within Adobe Acrobat Sign which can be accessed from there. But what if you want the data from the form to populate a record in Microsoft Power Apps or Microsoft Dynamics? Adobe Acrobat Sign already has a connector for Adobe Acrobat Sign which allows you to send agreements with data from your records and update records. Adobe Acrobat Sign is also the preferred e-signature solution for Microsoft. In this article, we will walk through how you can add a record in Microsoft Dataverse when a web form is completed.
What are you are going to need
- Adobe Acrobat Sign for enterprise
- Microsoft Power Automate (standard Power Automate, no premium connectors required)
- Microsoft Power Apps or Dynamics
Scenario
In this scenario, we are collecting release forms. The webform is embedded on a webpage and is based on a PDF form. When the form is completed, we want it to populate it into an entity in Power Apps. This assumes a basic knowledge of creating Model-driven Power Apps. If you aren’t familiar with the concept, Microsoft has some great tutorials to help you get started building your own apps.
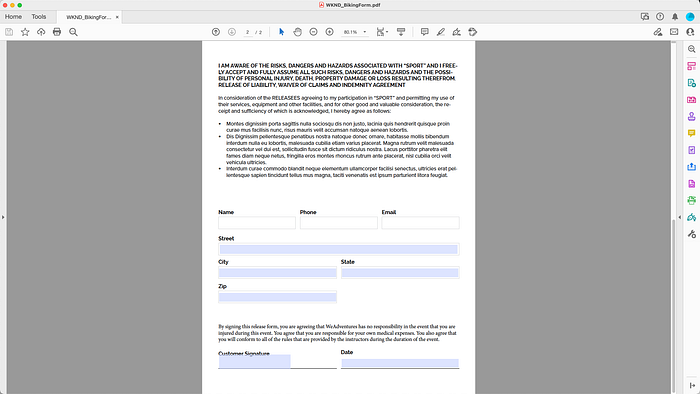
For this scenario, we have a form with the following fields:
- Name
- Phone
- Street
- City
- State
- Zip
- Signature
- Date
You will want to have corresponding fields for each of these fields in your entity in Microsoft Power Apps.
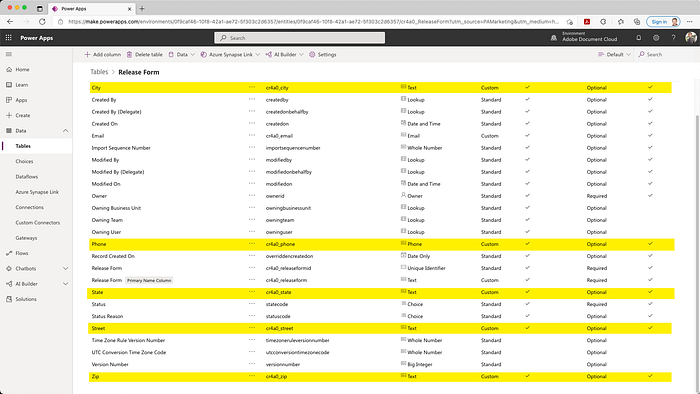
For this scenario, we are using a very basic entity that that has these fields. The method we will show later in this article can be used also with related records as well.
Setup your Adobe Acrobat Sign Web Form
In Adobe Acrobat Sign, you will need to create a Web Form. This can easily be done in a few quick and easy steps. A full description of how to create web forms is available here:
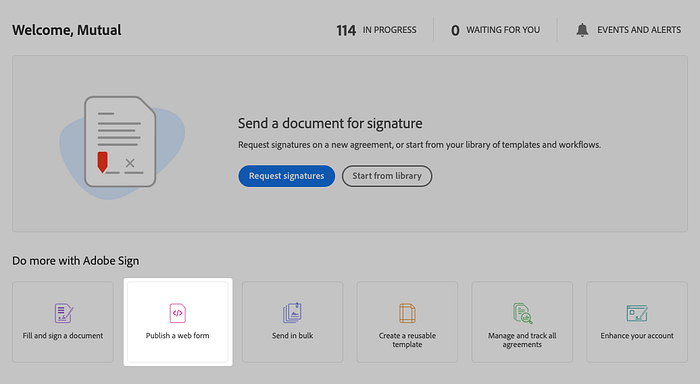
- Log into Adobe Acrobat Sign.
- Click on Publish a web form.
-
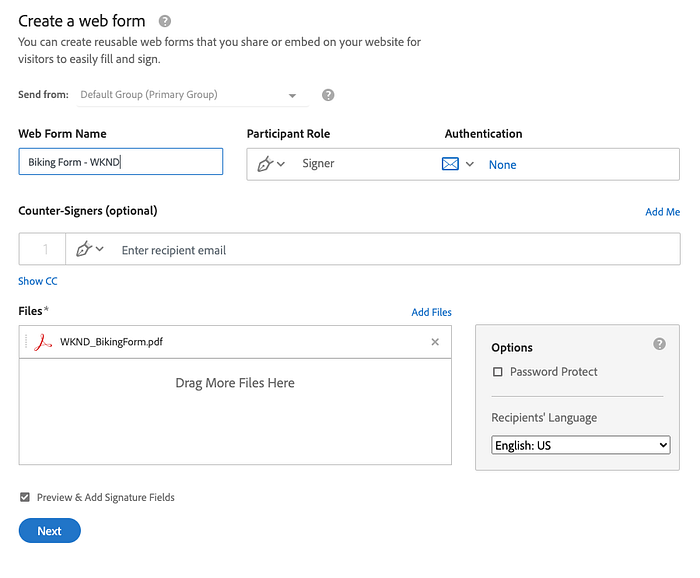
Fill in the name of your form and most importantly upload a copy of the document you want as your web form. You can choose from documents on your computer that are PDF, Word, Excel, PowerPoint, etc. If you use a PDF that has interactive form fields, they will get imported into Adobe Acrobat Sign.
-
Make sure to check Preview & Position Fields to allow you to place fields on your document.
-
Once ready, click Next.
-
You can then use the drag and drop authoring interface to place the fields where you need on the document. You can also customize the fields by double-clicking on the field to set which fields are required, set validation, etc. One important thing that you will want to do is set the name of your fields. This will make it easier for you to map your fields later on.
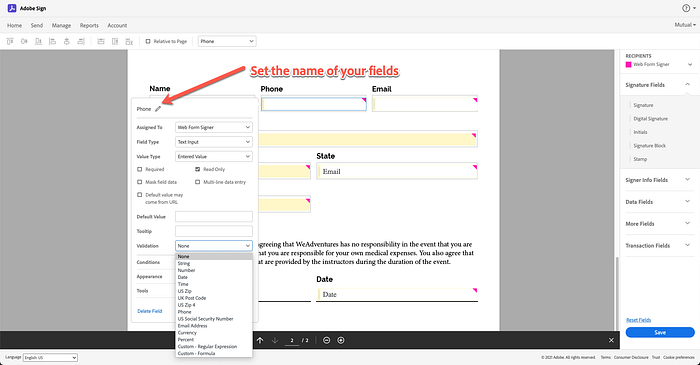
- Click Save.
You can then use the embed code or the URL to share on your website. In the next step, we will need to lookup the Web Form ID so we can use it within Microsoft Power Automate. Save the URL as we will want use that for testing later.
Lookup Web Form ID
In this step, we will use the Adobe Acrobat Sign interactive REST documentation to lookup the Web Form ID for the Web Form we just created. When navigating the documentation, “Widget” is the API name for Web Form.
- Navigate to Adobe Acrobat Sign REST documentation.
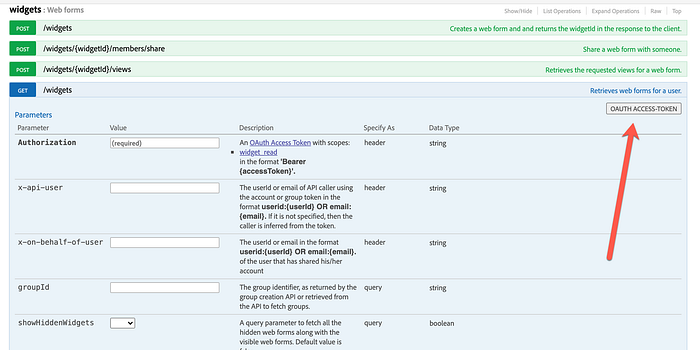
- Expand out Widgets > GET /widgets.
- Click on OAUTH ACCESS-TOKEN.
-
Check widget_read and click Authorize.
-
You will be prompted to login to Adobe Acrobat Sign. Login using your username and password.
-
Click on Try it out.
Get Ben Vanderberg’s stories in your inbox
Join Medium for free to get updates from this writer.
Remember me for faster sign in
In the output, the response is listed in order of newest to oldest. Look at the first web form and copy the ID value.
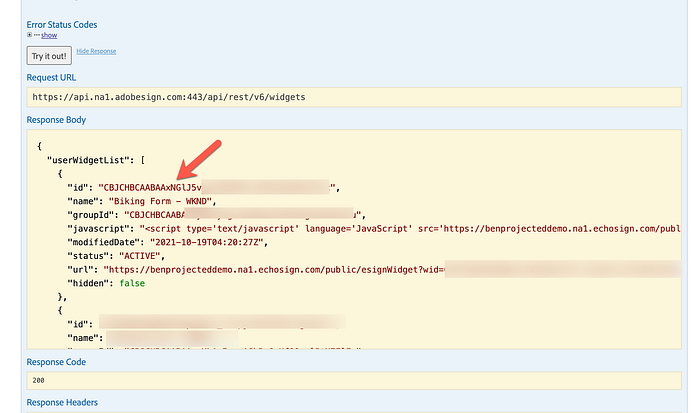
Copy the id value to your clipboard. We are going to use this in Microsoft Power Automate to create a flow that adds for the form data to a record in Microsoft Dataverse.
Create a flow from template
Adobe Acrobat Sign connector for Microsoft Power Automate allows you to easily connect Adobe Acrobat Sign to any connector inside of Microsoft 365 and third-party connectors. To make it easier to connect, there are also templates for you to easily configure to your needs. We are going to use one of these templates to create our record.
- Go to this template.
- If you have not already authenticated to Adobe Acrobat Sign, create a new connection for Adobe Acrobat Sign in Microsoft Power Automate using either your Admin or Group Admin credentials.
- Click Continue.
We then need to replace the Trigger with a When an event occurs trigger. The reason for this is that we want the flow to be triggered only when a specific web form is completed.
- In the Trigger When an agreement workflow is completed successfully, click the … menu and select Delete and click OK.
- Search for Adobe Acrobat Sign and select it.
- Under Triggers, select When an event occurs.
- In the new trigger set the following:Name: The name of your webhook. Ex. Web Form to Dataverse.Scope: Set to A specific resource. This is important for web forms, otherwise it will not work.Events — 1: Set the drop-down option to When an agreement workflow is completed successfully.Resource ID: Set it to the ID you copied from the REST documentation step.
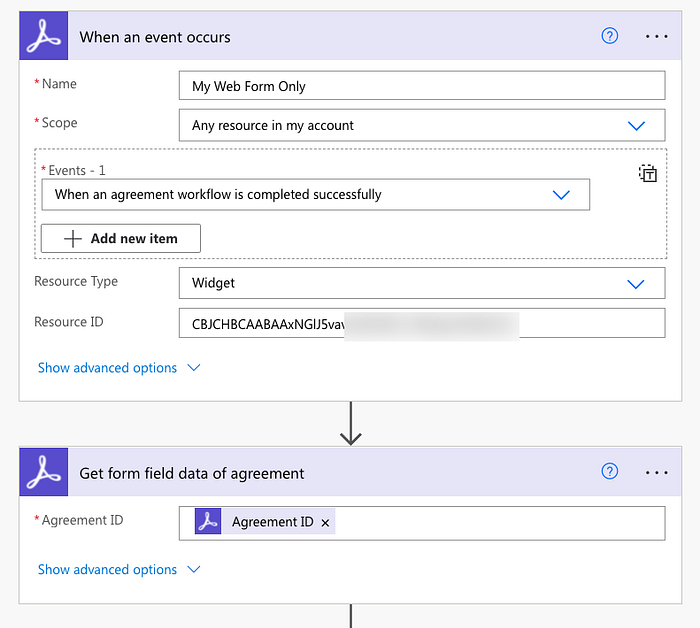
-
In the Get form field data of agreement action, if the Agreement ID is empty, use the Dynamic content panel to add Agreement ID variable.
-
Click Save.
Test your Web Form is connected
Now that you have setup the trigger in your flow, we want to make sure it is connected to your web form.
- To do a quick test that things are wired up correctly, click on Test. Select Manually and click Save & Test.
- Go to your Web Form URL that we generated in earlier steps.
- Fill and sign your web form. If you are prompted to verify your email address, check your email to do that. If you are going to be doing this a lot, you can disable this in your Account Settings by unchecking Require Signer to verify email address. This is fine for testing, but as a best practice you do want to verify signers when they sign.
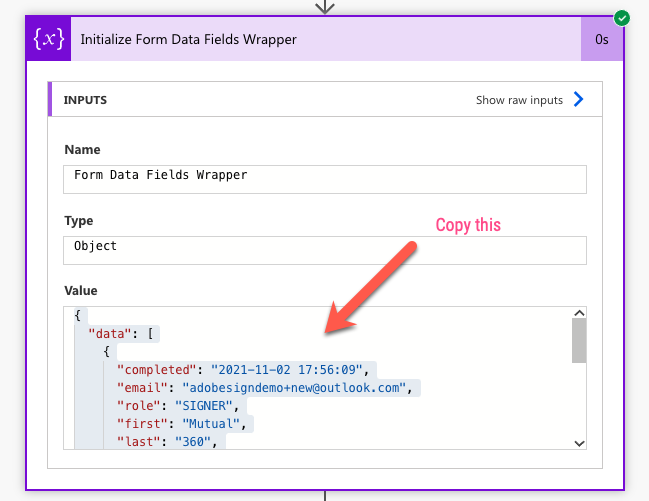
If everything looks right, you should see in Microsoft Power Automate that the flow has been triggered. View the flow that was ran in Power Automate and scroll all the way to the bottom. Expand out the Form Data Fields Wrapper and copy the value.
As a next step, we now need to add to the flow the step to write to Microsoft Dataverse.
Add actions to write to Microsoft Dataverse
In this next part, we need to take the form field data, parse the JSON, and then write it to Microsoft Dataverse. To do this, we need to go to the end of the flow and add a few actions.
We are going to add a step to write the form field data to our record in Dataverse, and then attach the signed document to the record.
- Edit your flow in Microsoft Power Automate.
- Click on + New step.
- Search for Parse JSON and select the Parse JSON action.
- In the Content field, use the Dynamic Content panel to select the variable Form Data Fields Wrapper from the previous step.
- Click on Generate from sample, paste in your JSON we copied from the value before, and click Done.
Great! Now we we will be able to select those form field values when mapping your fields to your Dataverse action.
- Click on + New step.
- Search for dataverse.
- Select Add a new row. This may add an Apply to each loop around the new action. Don’t worry about this, this is because the data that comes from Adobe Acrobat Sign Form fields could have multiple rows if multiple people filled out the form. In this case, if we only have one recipient filling it out, the loop won’t matter. If you do have multiple recipients filling, then you will have to do this a bit differently to merge the array of values together.
- Choose the environment in which your Table/Entity is located. In our case, we have an entity called Release Forms.
- Click on Show advanced options to expand out the action.
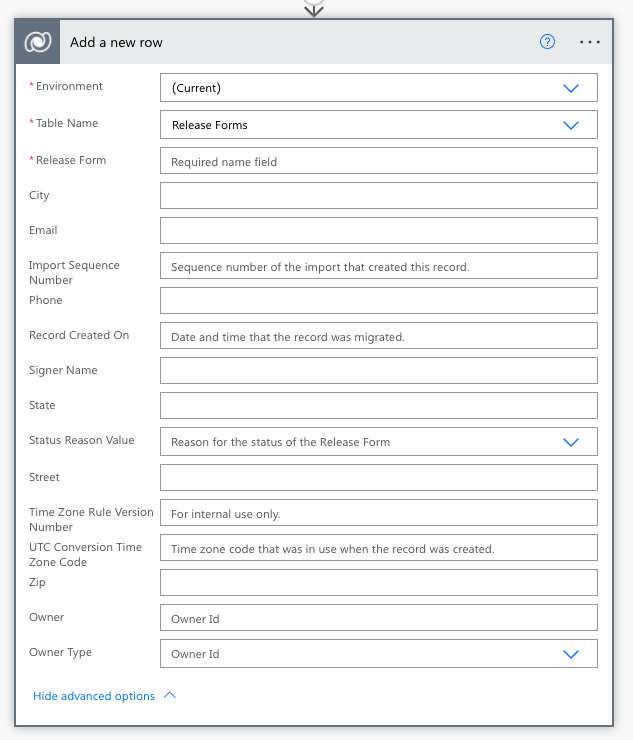
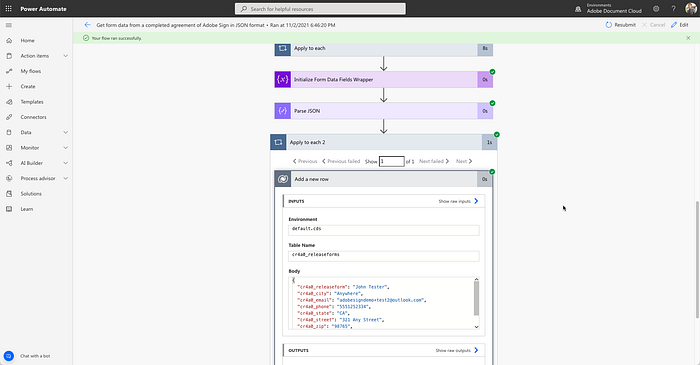
At this point, we now can see all of the different fields in that table in Dataverse. Using the Dynamic content panel, we can then map our fields to the corresponding fields from the Parse JSON action. In our example, the mapping should look something like this:
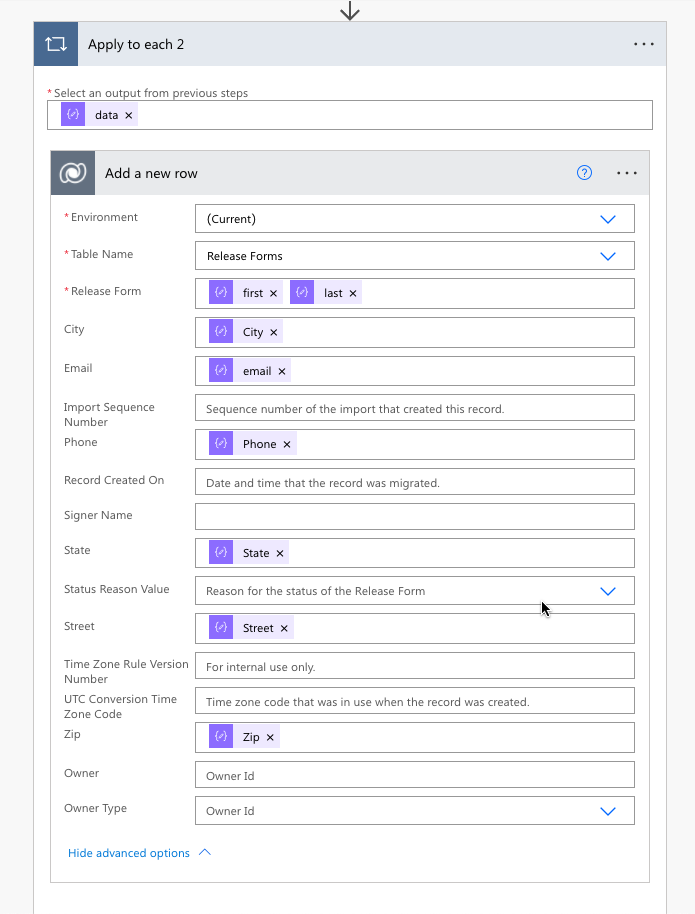
Notice that we mapped each of the fields from the document to the fields in the record. With this, we are all set. We can now test to make sure things are mapped correctly.
Test your Web Form is connected
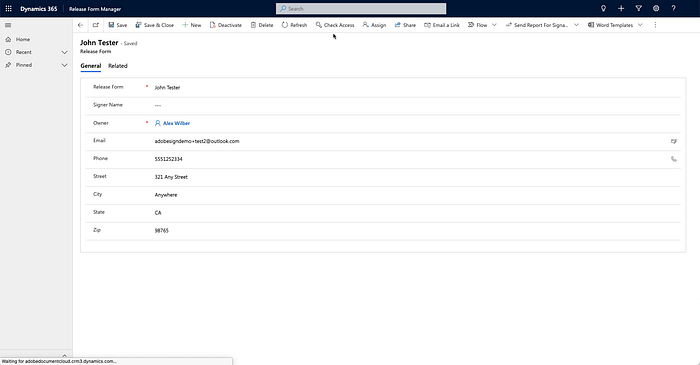
To test your web form, we are going to go back to our Web Form URL, fill out the form out the form one more time. If all is correct, you will see your flow run successfully.
In Power Apps or Dynamics, you will then that record populated into your app:
Final thoughts
Adobe Acrobat Sign Web Forms provide a fantastic way for you to collect forms on your website along with e-signatures. They also provide a great way to turn your PDF forms into easy online interactive documents. By integrating with Microsoft Dynamics or Power Apps, it gives you the flexibility to also populate the data into our data records, wherever they are. You can use this same technique for any agreements with Adobe Acrobat Sign as well populating into other places like SharePoint and others.
If you want to get started developing, you can create an Adobe Acrobat Sign Trial. If you are looking for other ways to automate document processes, have a look at Adobe PDF Services templates in Power Automate, which use our Adobe Document Services to do things like document generation, PDF services, or extracting data.