
Adobe Sign for Microsoft Power Automate connector provides the flexibility to automate several of your document workflows, receive electronic signatures, etc. In combination with connections to Office 365 Users and the over 200 connectors available in Microsoft Power Automate, this gives you great power to automate document routing instead of manually entering information.
In Fall 2020, Adobe Sign for Microsoft Power Automate connectors were updated to allow you to set your flow based off of a variable number of recipients rather than a fixed number of recipients. The new connector gives you tremendous flexibility when used with Microsoft Power Automate or Microsoft Power Apps.
In this post, you’ll learn how to take advantage of the variable number of recipients based on a contract value triggered from Microsoft SharePoint.
The following scenario will:
- Be triggered by a selected file in SharePoint.
- Check if a parameter is greater than $10K contract value.
- If larger than $10K, it will add your manager as a signer before the customer.
- If less than $10K, it will set you as the signer and send you an agreement to sign.
Download a sample workflow
For those of you already familiar with Microsoft Power Automate, download the sample Flow here.
Join Medium for free to get updates from this writer.
Remember me for faster sign in
If you’re less familiar with Microsoft Power Automate and you want to learn how to build the Flow from scratch, read on.
What you will need
- Adobe Sign for enterprise
- Microsoft Power Automate
If you don’t already own Adobe Sign for enterprise but still want to try it out, get a trial here.
Creating your flow
Create a flow
- Log into Microsoft Power Automate.
- Click Create in the sidebar.
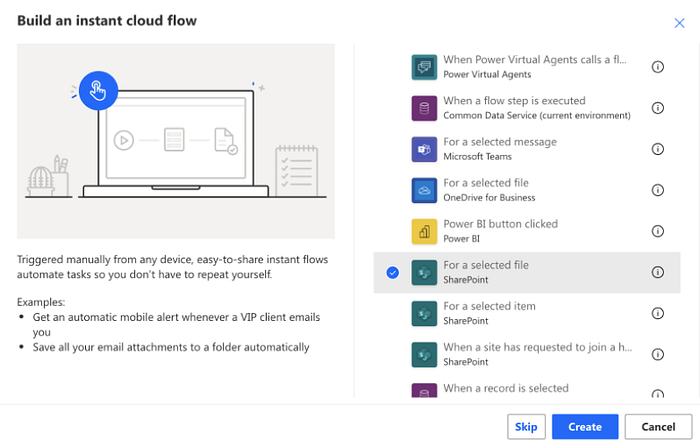
- Click Instant cloud flow.
- Set your Flow name to what you would like to call your flow. e.g. Send for contract approval.
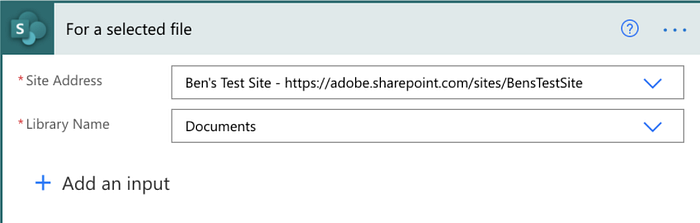
- Under choose how to trigger this flow, select For a selected file (SharePoint).
- In the Site Address field, set the SharePoint site you want associated with this flow.
- In the Library Name Field, set the SharePoint library name you want associated with this flow.
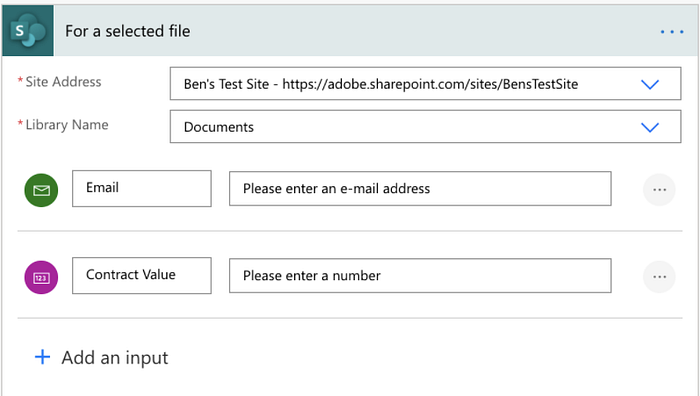
Add input parameters
Now we need to add input parameters to our flow. These will be prompted in SharePoint when the flow is started.
- In your trigger For a selected file, click + Add an input.
- Add an Email Field and name it Customer.
- Click + Add an input.
- Add a Number field and call it Contract Value.
Create a recipients variable
Next, we will create a recipients variable. This will be used to add or remove recipients.
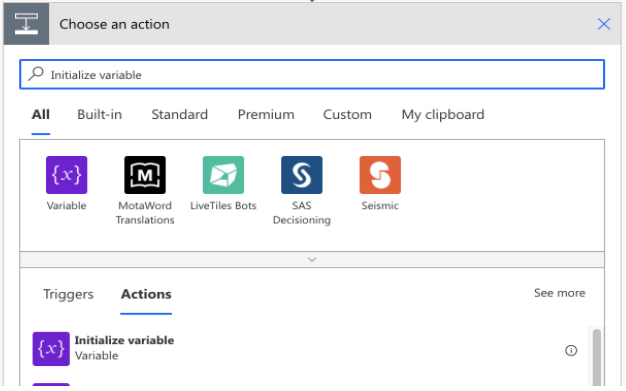
- Click + New step.
- Search for Initialize variable.
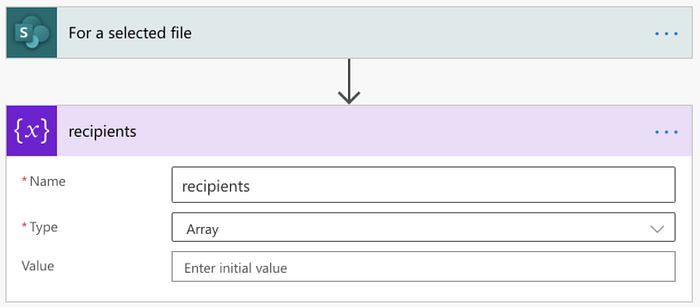
- In the Name field, set it to Recipients.
- In Type field, set it to Array.
- Now create another Initialize variable step as you did between steps 1–2. This time name it Order and setting the Type to Integer. Set the Value to 1.
We are going to use the order variable to determine the order of recipients so that we can dynamically add and remove them. If a recipient has the same order number, then it will go out to recipients simultaneously.
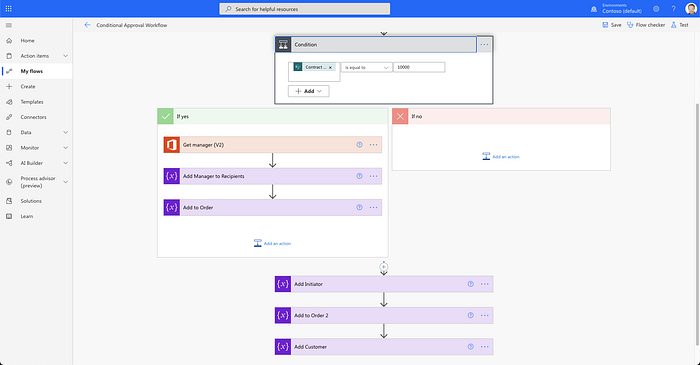
Add a condition
Next we are going to add a condition to determine the route to take based on the contract value.
- Click + New step.
- Click on Control.
- Click on Condition.
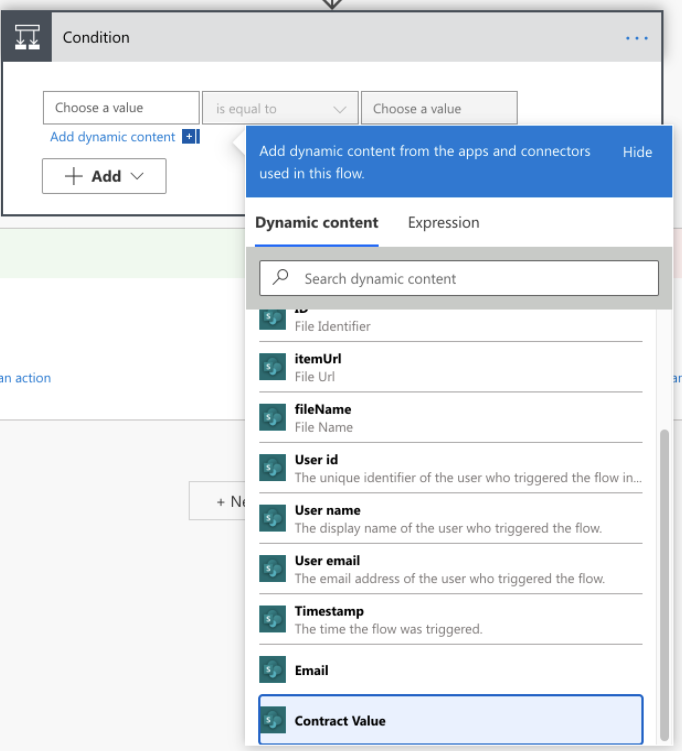
- In Choose a value, use the Dynamic Content panel to select Contract Value.
- Click on is equal to and set Choose a value to 10000.
Add Adobe Sign step
We will add the details of the condition a little later. Next, we are going to add an Adobe Sign Create an agreement step after the Condition. In this scenario, we are going to use an agreement from a library template, but you can use any of the other Create agreement options as well such as via URL, transient document, etc.
- After the Condition action, Click + New step.
- Search for Adobe Sign and select.
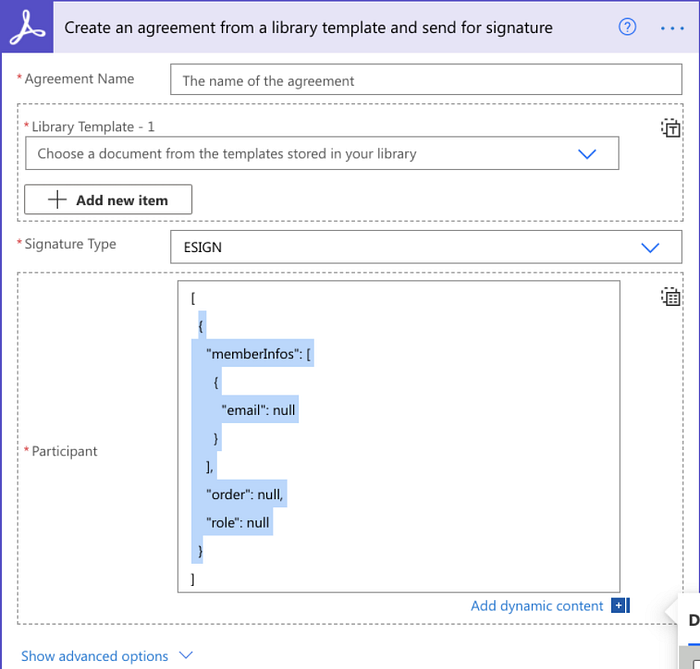
- Search for Create an agreement from a library template and send for signature.
- In the new Adobe Sign step, click the toggle to switch to show entire array.
- Now you will see the JSON exposed. Copy the text in between the brackets [] and copy it to your clipboard.
Configure manager escalation
Now we are going to go back and configure the condition. If the contract is greater than $10K, we want our manager to approve the contract before it goes for signature to the initiator and then the customer. To do this, we are going to use Office 365 User to get the current user’s manager.
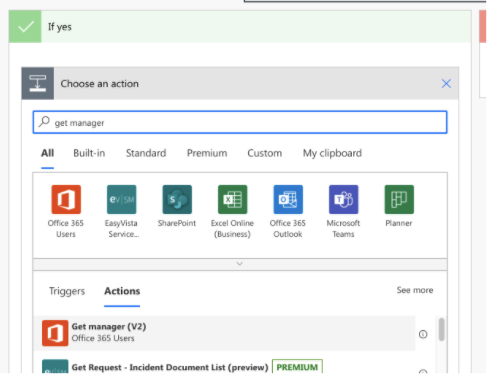
- Click on the Condition action. Under the If yes section of the condition, click Add an action.
- Search for Get manager (V2)
- In the User (UPN) field, use the Dynamic Content panel to select User id.
- Click add an action.
Now we are going to append this recipient to our recipients array that we created earlier.
- Search for append to array variable.
- Set Name to Recipients.
- In the Value field, paste the copied JSON from your clipboard. This was copied from the Create an agreement from a library template and send for signature Adobe Sign step.
- In the JSON text, we are going to input variables where “null” is written. Using your Dynamic Content panel, change the email value to the Mail variable from Get manager (v2) 2. Then change the order value to the Order variable under Variables. Set the role to “APPROVER”.
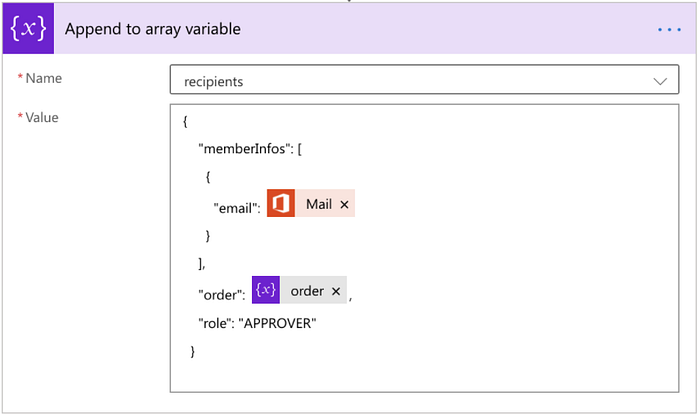
- Use the … menu to rename the step Add Manager to Recipients.
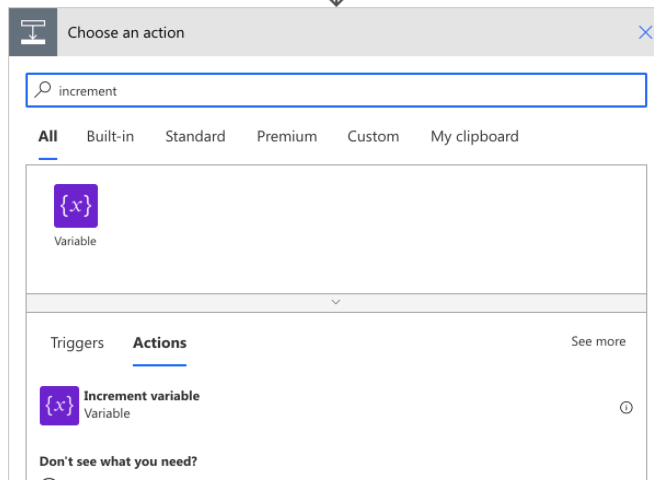
- Click + New step after the Add Manager to Recipients step, still in the If yes section.
- Search for Increment.
- Select Increment variable.
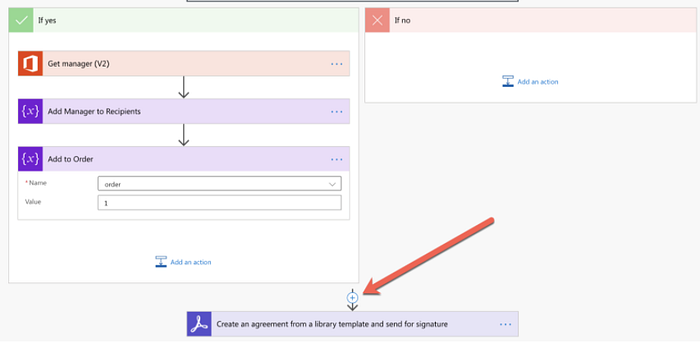
- In Name, set it to order.
- In Value, set it to 1.
- Click on the … menu to rename the action to Add to Order.
This will now increment the Signer Order by 1, so the next signer will be Signer 2.
Add Initiator recipient
Next, we need to add our initiator and customer as recipients. So far, if the value is greater than $10K, the manager will be the first signer, then the initiator, then the customer. If it is less than that, it will just go to the initiator and the customer.
- Between the Adobe Sign step and the Condition, click the + to add an action.
- Search for Append to array variable and add that new step.
- Under Name, select recipients.
- Similar to what we did previously, paste the JSON from Adobe Sign into the variable.
- Change the value of email to User email, order to Order variable, and role to “SIGNER”.
- Rename the step “Add Initiator”.
You will notice at this point that we used “APPROVER” for the manager and “SIGNER” for the initiator. These are different signing roles, which you can learn more about here.
Add customer recipient
Now that we have added the main parts, the next parts are easy because we can copy from previous steps in the workflow.
- Go back to your step Add to Order step, click on the … menu and select Copy to my clipboard.
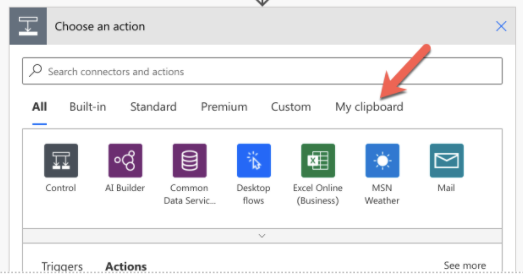
- After Add Initiator step, click the + sign and Add an action.
- Switch to the My Clipboard tab.
- Select Add to Order in the list.
- Next, go to your Add Initiator step, click the … menu and select Copy to my clipboard.
- After Add to Order 2 step, Add an action.
- Switch to the My Clipboard tab.
- Select Add Initiator in the list.
- Rename the new step to Add Customer.
- Change the email parameter to Customer Email using the Dynamic Content panel.
- Save your flow.
Give it a try

Now that you have the action set up, you can now use it within your SharePoint document library.
- Go to your SharePoint website.
- Select the file you want to send for signature.
- Click Automate in the ribbon and select your flow.
- Click Continue.
- Click Run flow.
Final Thoughts
Conditional routing of documents for signature provides much-needed flexibility, allowing you to route documents to different signatories within your organization without relying on a multitude of complex workflows or institutional knowledge. In combination with the Office 365 Users connector, you can intelligently route escalations based on Azure AD, which is extremely useful.
If you are interested in these actions, also have a look at ways you can use Adobe Creative Cloud and Adobe PDF Tools to automate your document actions.